
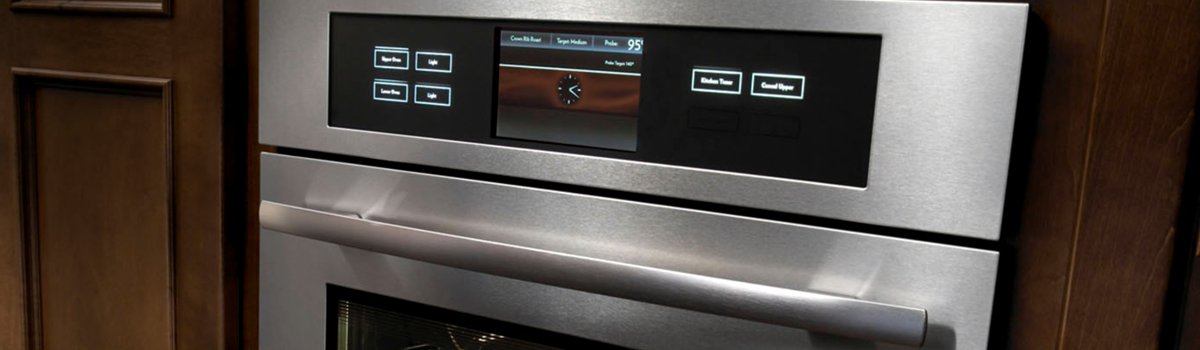
Seeing FC on your JennAir oven or stove usually points to a door switch error—the control isn’t convinced the door is fully closed. Because the door switch is a safety device (it governs bake/broil operation and self-clean), the appliance may refuse to heat, stop mid-cycle, or lock/unlock at the wrong time. The good news: most FC issues are simple—think misaligned latch, sticky switch plunger, or a loose harness—and you can often diagnose the basics at home in minutes.
What the FC Error Really Means
In plain terms, the oven’s brain is asking, “Is the door closed?” and not getting a trustworthy “yes.” That can happen if:
- The door switch (a small clicky microswitch near the latch) isn’t changing state when the door closes.
- The latch/striker on the door isn’t hitting the switch correctly (misalignment or bent parts).
- The hinges are worn or out of square, so the door looks closed but doesn’t press the switch far enough.
- The wiring harness to the switch is loose, oxidized, or damaged.
- Less commonly, the control board is misreading a good switch.
Note: On certain models, FC may also appear after power interruptions during Self-Clean, when heat and expansion make marginal hinges or latches show their age.
Quick Safety Notes (Read This First)
- Power off at the breaker before removing panels or touching wiring.
- Ovens hold sharp sheet metal and hot components. If the unit was in use, let it cool completely.
- If you smell gas (dual fuel), stop and call a professional.
Fast Checks You Can Do Without Tools
Start here; these quick wins clear many FC alerts.
1) Confirm the door is actually closing “tight.”
Close it slowly. You should feel a firm last bit of resistance and hear/feel a gentle click as the switch actuates. If you must lift or push the door to get that click, you likely have hinge or alignment issues.
2) Look for obvious misalignment.
Stand to the side—does one corner sit higher? Are gaps uneven across the top? A sagging door won’t depress the switch fully.
3) Inspect the latch/striker area.
Open the door and find the metal striker that mates with the frame latch/switch. If it’s bent, loose, or gummed up with baked-on residue, the switch may never “see” closed.
4) Clean the switch plunger area.
With power off, use a dry cloth or cotton swab to clear grease and debris around the switch opening/latch. Do not soak the area—moisture can kill microswitches.
5) Reboot the control.
Flip the circuit breaker off for 5 minutes, then back on. If FC immediately returns when you close the door, continue with the steps below.
DIY Fixes (Step-by-Step)
Work methodically; stop if something doesn’t match your model.
A) Reseat and adjust what you can see
- Tighten the striker:
With power off, verify the striker screws are snug. A few millimeters of drift can keep the switch from closing. - Micro-adjust the fit:
Very small bends (think tiny) to realign a clearly tipped striker can restore proper contact. Don’t over-bend—keep it straight and centered. - Check hinges for play:
Lift up gently on the open door. If there’s excess wobble, your hinges or hinge receivers may be worn. That’s a parts fix (see “When to call a pro”).
B) Test the switch (basic)
For confident DIYers with a multimeter only.
- Access the switch:
On many models it’s behind the control panel/upper trim or accessible from the front frame. Remove the relevant trim carefully (sharp edges). - Set meter to continuity (beep) or ohms.
With power off and connectors removed, press the switch plunger: Door open (plunger out): Expect one state (open circuit or high resistance). Door closed (plunger in): Expect the opposite state (closed circuit or near-zero ohms).
If the reading doesn’t change, the switch is bad. - Inspect wiring:
Look for heat-darkened spades, loose slip-on terminals, or broken insulation. Reseat each connector firmly.
If the switch fails continuity or feels mushy/crunchy: replace it. Door switches are relatively inexpensive and model-specific—match by full model number.
Clear, Then Verify (Functional Test)
- Power the unit back on.
- Close the door normally—listen for that click.
- Start a low-temp Bake (e.g., 300°F).
- If FC does not return and the oven heats steadily, your fix held.
- Open/close the door mid-preheat a couple of times to confirm stability.
Preventive Care That Actually Works
A little routine care prevents most FC callbacks.
Keep alignment true (no slamming).
Oven doors are heavy. Avoid leaning on the open door or using it as a shelf; that slowly bends hinges and receivers.
Clean the latch area, not just the glass.
Grease or sugar residue around the latch/striker hardens with heat. Wipe this area during normal cleanups (unit cool, power off). Avoid flooding liquids into the switch cavity.
Mind the gasket.
A torn or swollen gasket changes how far the door travels. Clean with mild soap/water; replace if frayed or flattened.
Go easy on Self-Clean.
Self-Clean is convenient but hard on latches, switches, and hinges. If you run it, inspect alignment afterward. Consider manual cleanings between heavy cycles.
Check leveling.
An out-of-level range can twist the frame. A quick carpenter’s level and small foot adjustments keep the door square to the switch.
Professional Repair—When to Call
Skip DIY and book service if:
- The door is visibly sagging or scraped the frame (hinge/receiver replacement likely).
- The switch tests good, but FC persists (control input or wiring fault).
- You’re uncomfortable removing trims or testing continuity.
A pro will meter the switch under load, verify harness integrity, inspect hinge geometry, and—if needed—replace the switch, latch assembly, or hinges. If the board is at fault, they’ll confirm before swapping parts.